Words: Joanne M. Anderson
Photos: Western Specialty Contractors
Old masonry buildings are attractive not only for their style, craftsmanship and architecture, but also they project a historical aura that captivates the imagination. Among the reasons millions of people flock to living history museums like Colonial Williamsburg, Old World Wisconsin, Plimoth Plantation
City walking tours spotlight brick buildings like Independence Hall [1753] in Philadelphia, Faneuil Hall [1743] in Boston and Union Station [1916] in Dallas. The Chicago River Boat Architecture Tour showcases 100-year-old Art Deco styles along with neo-classical and gothic towers. Millennials are buying tiny homes and lofts in repurposed brick mills in Baltimore, and brick textile mills all over New England have been renovated into offices, retail space and more living quarters.
Old brick walls — interior and exterior — evoke warm, rustic, enduring qualities coupled with cultural, aesthetic and historical significance. With today’s keen attention to recycling and repurposing plus sustainability, brick is garnering much attention.
So, to keep these sought after buildings for the tourist, the shopper, the local resident, businesses and prospective homebuyers, as well as tangible expressions of our heritage, acute consideration needs to be focused on maintenance and preservation. It may just begin with a camera.
PHOTOGRAPHY
“Photo documentation is imperative,” states Adam Gdowski, project manager with Western Specialty Contractors, a century-old firm with more than 30 offices in the U.S. Headquartered in Chicago, the company is grounded in trust and respect among its network of skilled member companies and high quality workers. “When dealing with an older building, more than likely there is already some existing damage,” Gdowski continues. “No one wants to take the fault for that. You want to make sure that the owner and everybody involved are aware that: ‘hey, there is a hairline crack in this area.’ If we remove a piece or take out any type of material which is compromised, then that damage could be attributed to us.”
It is very wise to take photographs of everything, overall and close up, from different angles and even at different times of day. Lighting, shadows from trees and even mist in the air can camouflage something visible in different conditions or from a particular position.
PEOPLE
Historic preservation and restoration can be highly specialized, and depending on the scope of the project, it may include many people with different areas of expertise. The cliché “time is money” may be overused, but that does not make it overstated. Delegating comes into play when the workload is best divvied up among a few or many professionals akin to a football team. Each individual, contractor or company brings different skills, experiences and abilities, and when put together, the preservation project runs like a well-oiled machine.
- Property owner
- Architects
- Building contractors
- Engineers
- Chemists and scientists
- Historic preservation experts
- Masonry professionals
- Government entities
- Clerical support
- Professional photographer
- Subcontractors
- And more.
MORTAR
Once the building’s owner has defined the mission in terms of repair, restore, repoint or remove and rebuild, and a sufficient number of photos have been taken with captions and notes, then identifying the materials may be next, as well as the cause of the deterioration. Time and weather are top contenders for historic building damage, but seepage from unsuspecting places, mildew, birds or small animals, moss, vines, compromised interior spaces and other issues can break down mortar joints.
“Typically, historical mortars will have more of a lime mortar compared to today’s Portland cement type,” Gdowski advises. “The lime is softer. You need to be a little more careful in terms of removing the joints that need replacing, and then you have to use that same lime putty mortar, which is a Type L not a Type N. Type N is too hard to place in historical masonry; it’s not breathable compared to the lime mortar.”
He suggests beginning with a kind of chisel or hammer, like an Arbortech tool, with a small saw blade, instead of a grinder that is typically used to remove mortar. Or, in some instances, for some type of buildings, depending on how historical or how the engineer or architect wants it done, Gdowski recommends a hand chisel to remove old mortar. Then clean out the joints with a vacuum, pre-wet the open mortar joint and reinstall, pouring in historical lime mortar followed by identical tooling.
Most of the mortar used on historic buildings in the pre-Portland cement era is type L mortar, the lime putty product. To preserve authenticity, it is essential that the same type mortar is used in the identical color, texture and tooling. Mortar not consistent with the original can damage the bricks in a process called spalling. To spall is to break into pieces or cause fragments to break off.
The wrong mortar on old bricks can also cause cracks or interior mortar rot. Traditional mortar like lime permits old masonry to breathe. Color and texture have to be a perfect match, which is possible, to preserve the aesthetics as they were intended at the time of construction and match the rest of the building, especially if just repairing one section. In many cases, you simply cannot use new tools or techniques to recreate the old look.
The best way to know precisely what you are dealing with is to have mortar tested at one of many sophisticated labs around the country. Highbridge Materials Consulting, Inc., in Pleasantville, N.Y., has been in business more than 10 years and is one, which performs materials testing and analysis on contemporary and historic construction projects. “Our team of materials scientists brings many years of specialized expertise to your project and serves as a support group to assist in condition surveys, investigate concrete and masonry failures, and provide data that cannot be gained through more common inspection and testing methods.” [www.highbridgematerials.com]
CASE STUDY
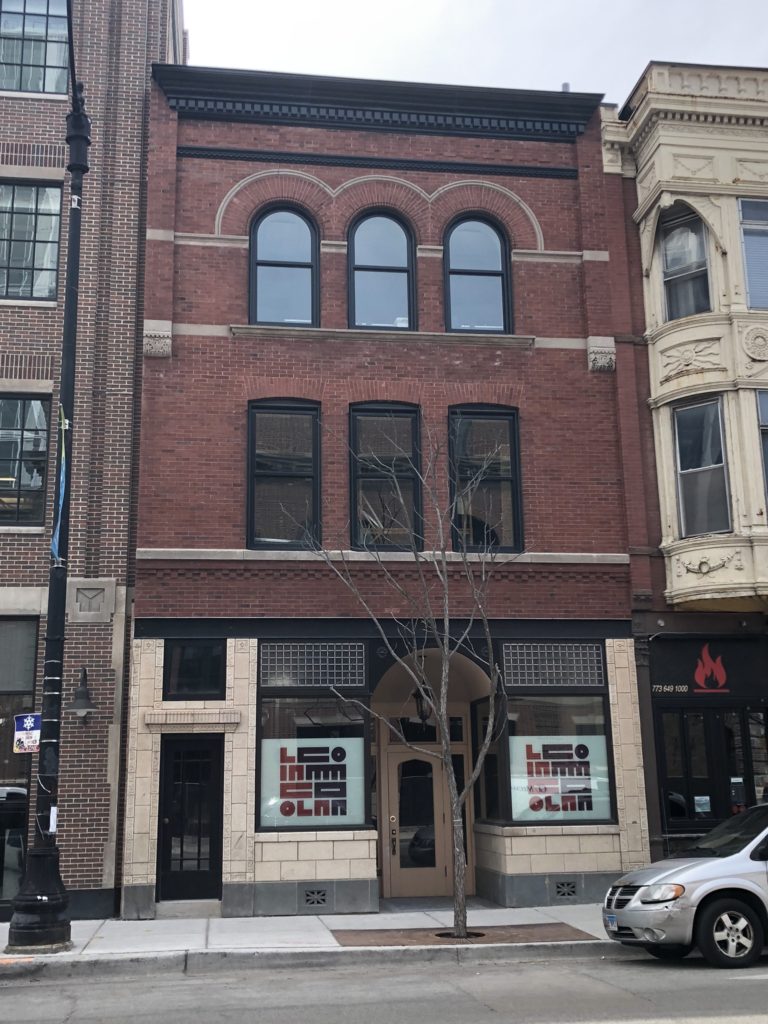
The front exterior of the circa 1890s Dental Professional Building on Lincoln Avenue in Chicago avoided the wrecking ball by having its unique, historic façade photographed, dismantled, washed, inspected, cataloged and stored for future use. It was then removed from under wraps and reassembled, brick by brick, and integrated into the new Lincoln Common mixed-use development at the edge of prestigious Lincoln Park neighborhood.
Home to tree-lined streets, museums, dining and nightlife, Lincoln Park is about a mile north of downtown, expensive and borders Lake Michigan. Preserving the heritage of the area with this brick façade of more than a century ago was lauded for safeguarding significant architectural features.
“In order to preserve and incorporate the architectural significance of the 1890s-vintage neighborhood commercial building, Western Specialty Contractors was given the unique opportunity to reconstruct the historic façade on a new building,” says project manager Adam Gdowski. Tapping other Chicago’s experts included Antunovich Associates as architect and W.E. O’Neil, in business more than 90 years, for general contractor.
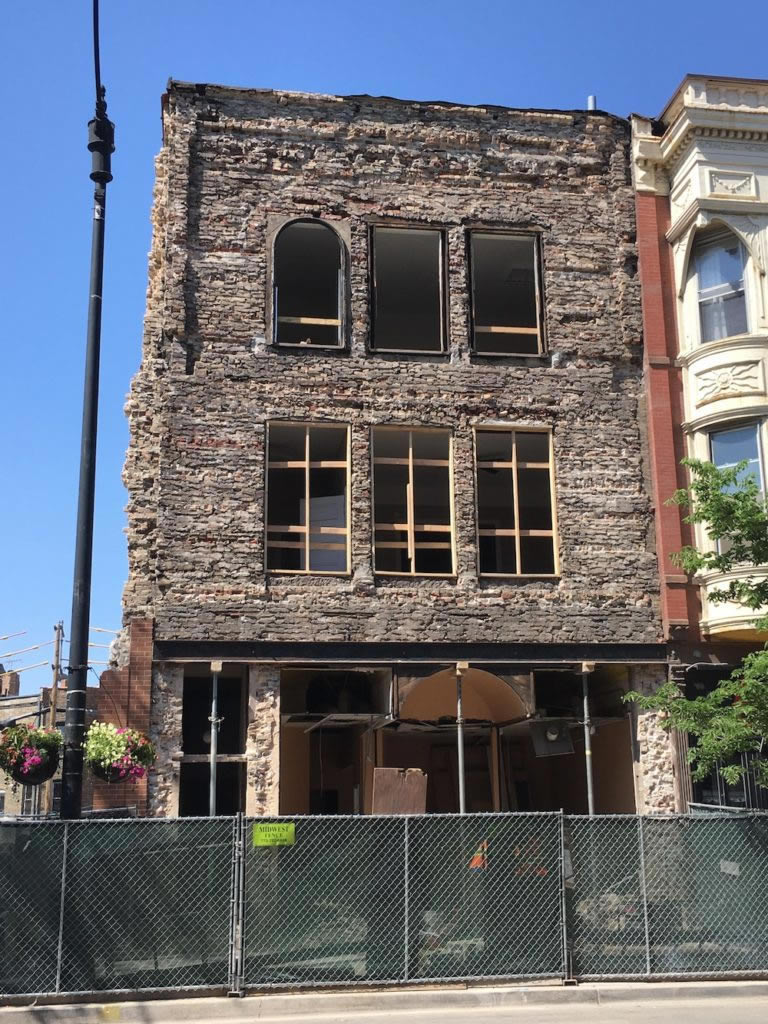
The scope of work, according to Gdowski, called for carefully removing the existing masonry, cleaning and salvaging all masonry components within the exterior façade, and storing the material until a new structure was ready to accept a rebuild of the existing masonry façade. “The backup in place was common brick and was demolished with the remaining building once the removal process was complete,” Gdowki recalls.
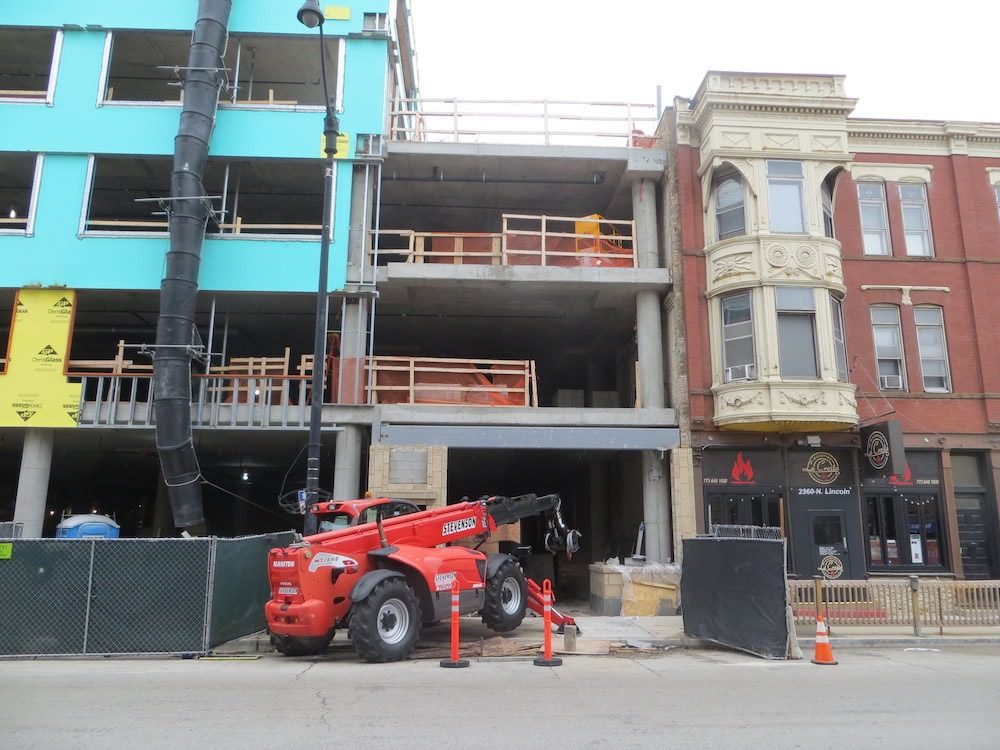
Pipe scaffolding was installed for access to the full exterior of the building. Starting from the top and working down, the highly skilled team carefully removed each brick and lowered them with a telehandler where all material was categorized and placed in custom crates. All detailed brick, limestone and terra cotta elements were coded and documented so they would be installed in the same location as they were previously. Once the rebuild began, the same method of pipe scaffolding and telehandler was used for material distribution.
“All of the façade pieces were carefully documented and left on site in custom-built crates. Once we received notice to proceed on the rebuild, the process began with CMU backup,” Gdowski explains. “The rest of the new building was constructed with cold form steel framing and exterior fiberglass gypsum wall sheathing, but due to the large limestone pieces, the historic portion needed CMU to tie in the masonry correctly.”
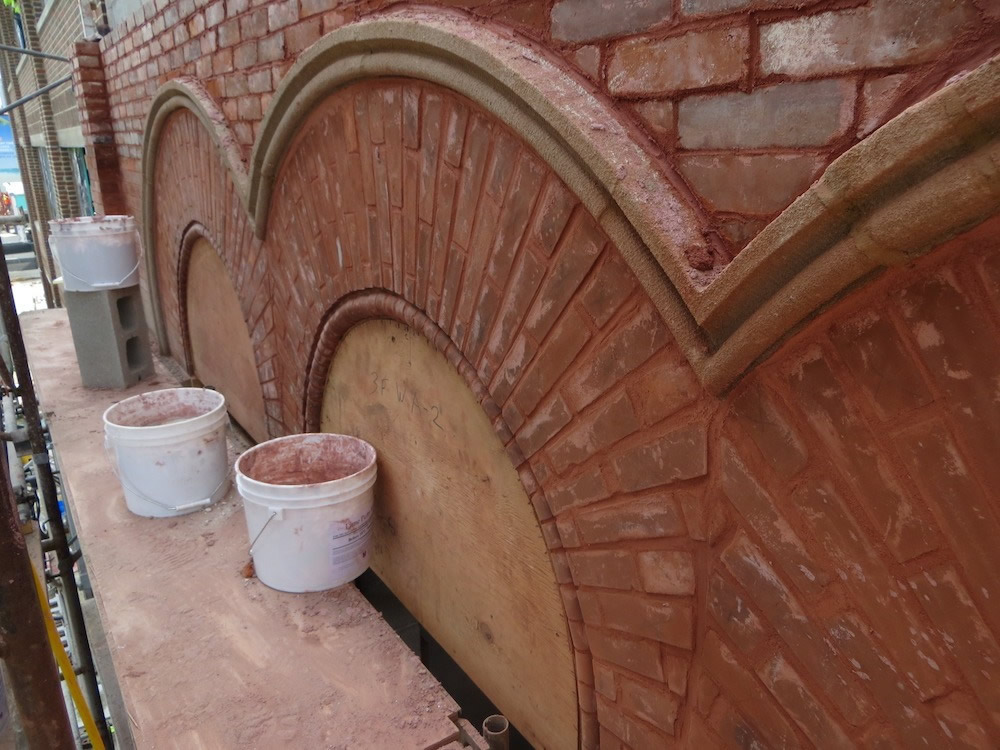
Every terra cotta piece for the first floor had been coded and cataloged and was put into the same location as previously. A new steel beam was installed above the first floor and then the process of brick and limestone installation proceeded for the remaining floors. Some damaged brick, which was documented before removal, needed to be replaced, and Western searched far and wide for old salvaged brick to match the existing old brick.
Gdowski reveals that to keep the historic look of the existing structure, type L mortar was used for reinstallation of the brick masonry. “This was needed,” he states, “to match the narrow mortar joints of the original structure. Non-hydraulic lime putty mortars are soft, porous and permeable. These are the mortars used to build most traditional buildings and are therefore normally the appropriate materials for the repair of these older buildings.”
“Once the rebuild was completed,” Gdowski points out, “we needed to recreate the decorative cornices. New ones were made identical to the old ones by taking them to a fabricator to match. Later, others installed the windows, doors and storefront materials. As a finished project, the elegance of the historic façade embellished the new building, which hosts offices and retail tenants.”
With a highly skilled team, Western Specialty Contractors was able to photograph, disassemble, mark and package the old façade in six weeks. The demolition, clean up and new construction took 10 months. The reinstallation then occurred over two months. The entire project was completed per schedule with the proper mortar for historical brick renovation, and Chicago’s Lincoln Commons proudly exhibits the city’s rich heritage with a very fine masonry façade from the 1890s.
Joanne M. Anderson is a southwest Virginia-based freelance writer. www.jmawriter.com