Natural stone is available in a myriad of products. Depending on which of those natural stone product forms one is using, guidance on proper installation practices can be found in a variety of sources. Publications from the MIA+BSI: The Natural Stone Institute, the Indiana Limestone Institute, the National Building Granite Quarries Association, ASTM International, and the Rocky Mountain Masonry Association all provide information on the installation of one or more specific stone applications. While split-face stone detailing may be referenced in these documents, comprehensive discussion and detailing of this specific product isn’t easily found in any current publication.
Perhaps the reason for a relative lack of detailing in this product is the fact that it appears to be very similar to installing brick, so the masons simply use the anchorage and methods that are already documented for brick and apply it to stone. That is a great start, but one must recognize that there are some fundamental differences between stone and brick facades, and those differences must be addressed for a successful installation.
First, let’s look at the product itself. The stone facades can be either uniformly or randomly coursed. Course heights can get quite high. When randomly coursed, they are never, truly “random”. The designer usually has some predetermined pattern about how the varying course heights lay together, and the field mechanics need to be aware of that patterning and follow it to satisfy the design. The second issue is color, in that oftentimes the wall is made up from a blend of different colors, and again, the designer has predetermined that blend and the ratio of each color component to be included in the wall. Correct ratios of varying course heights and colors must be accurately reflected in the order for the material. On larger jobs with multiple deliveries, the supplier must include proper ratios of each size and color for each delivery.
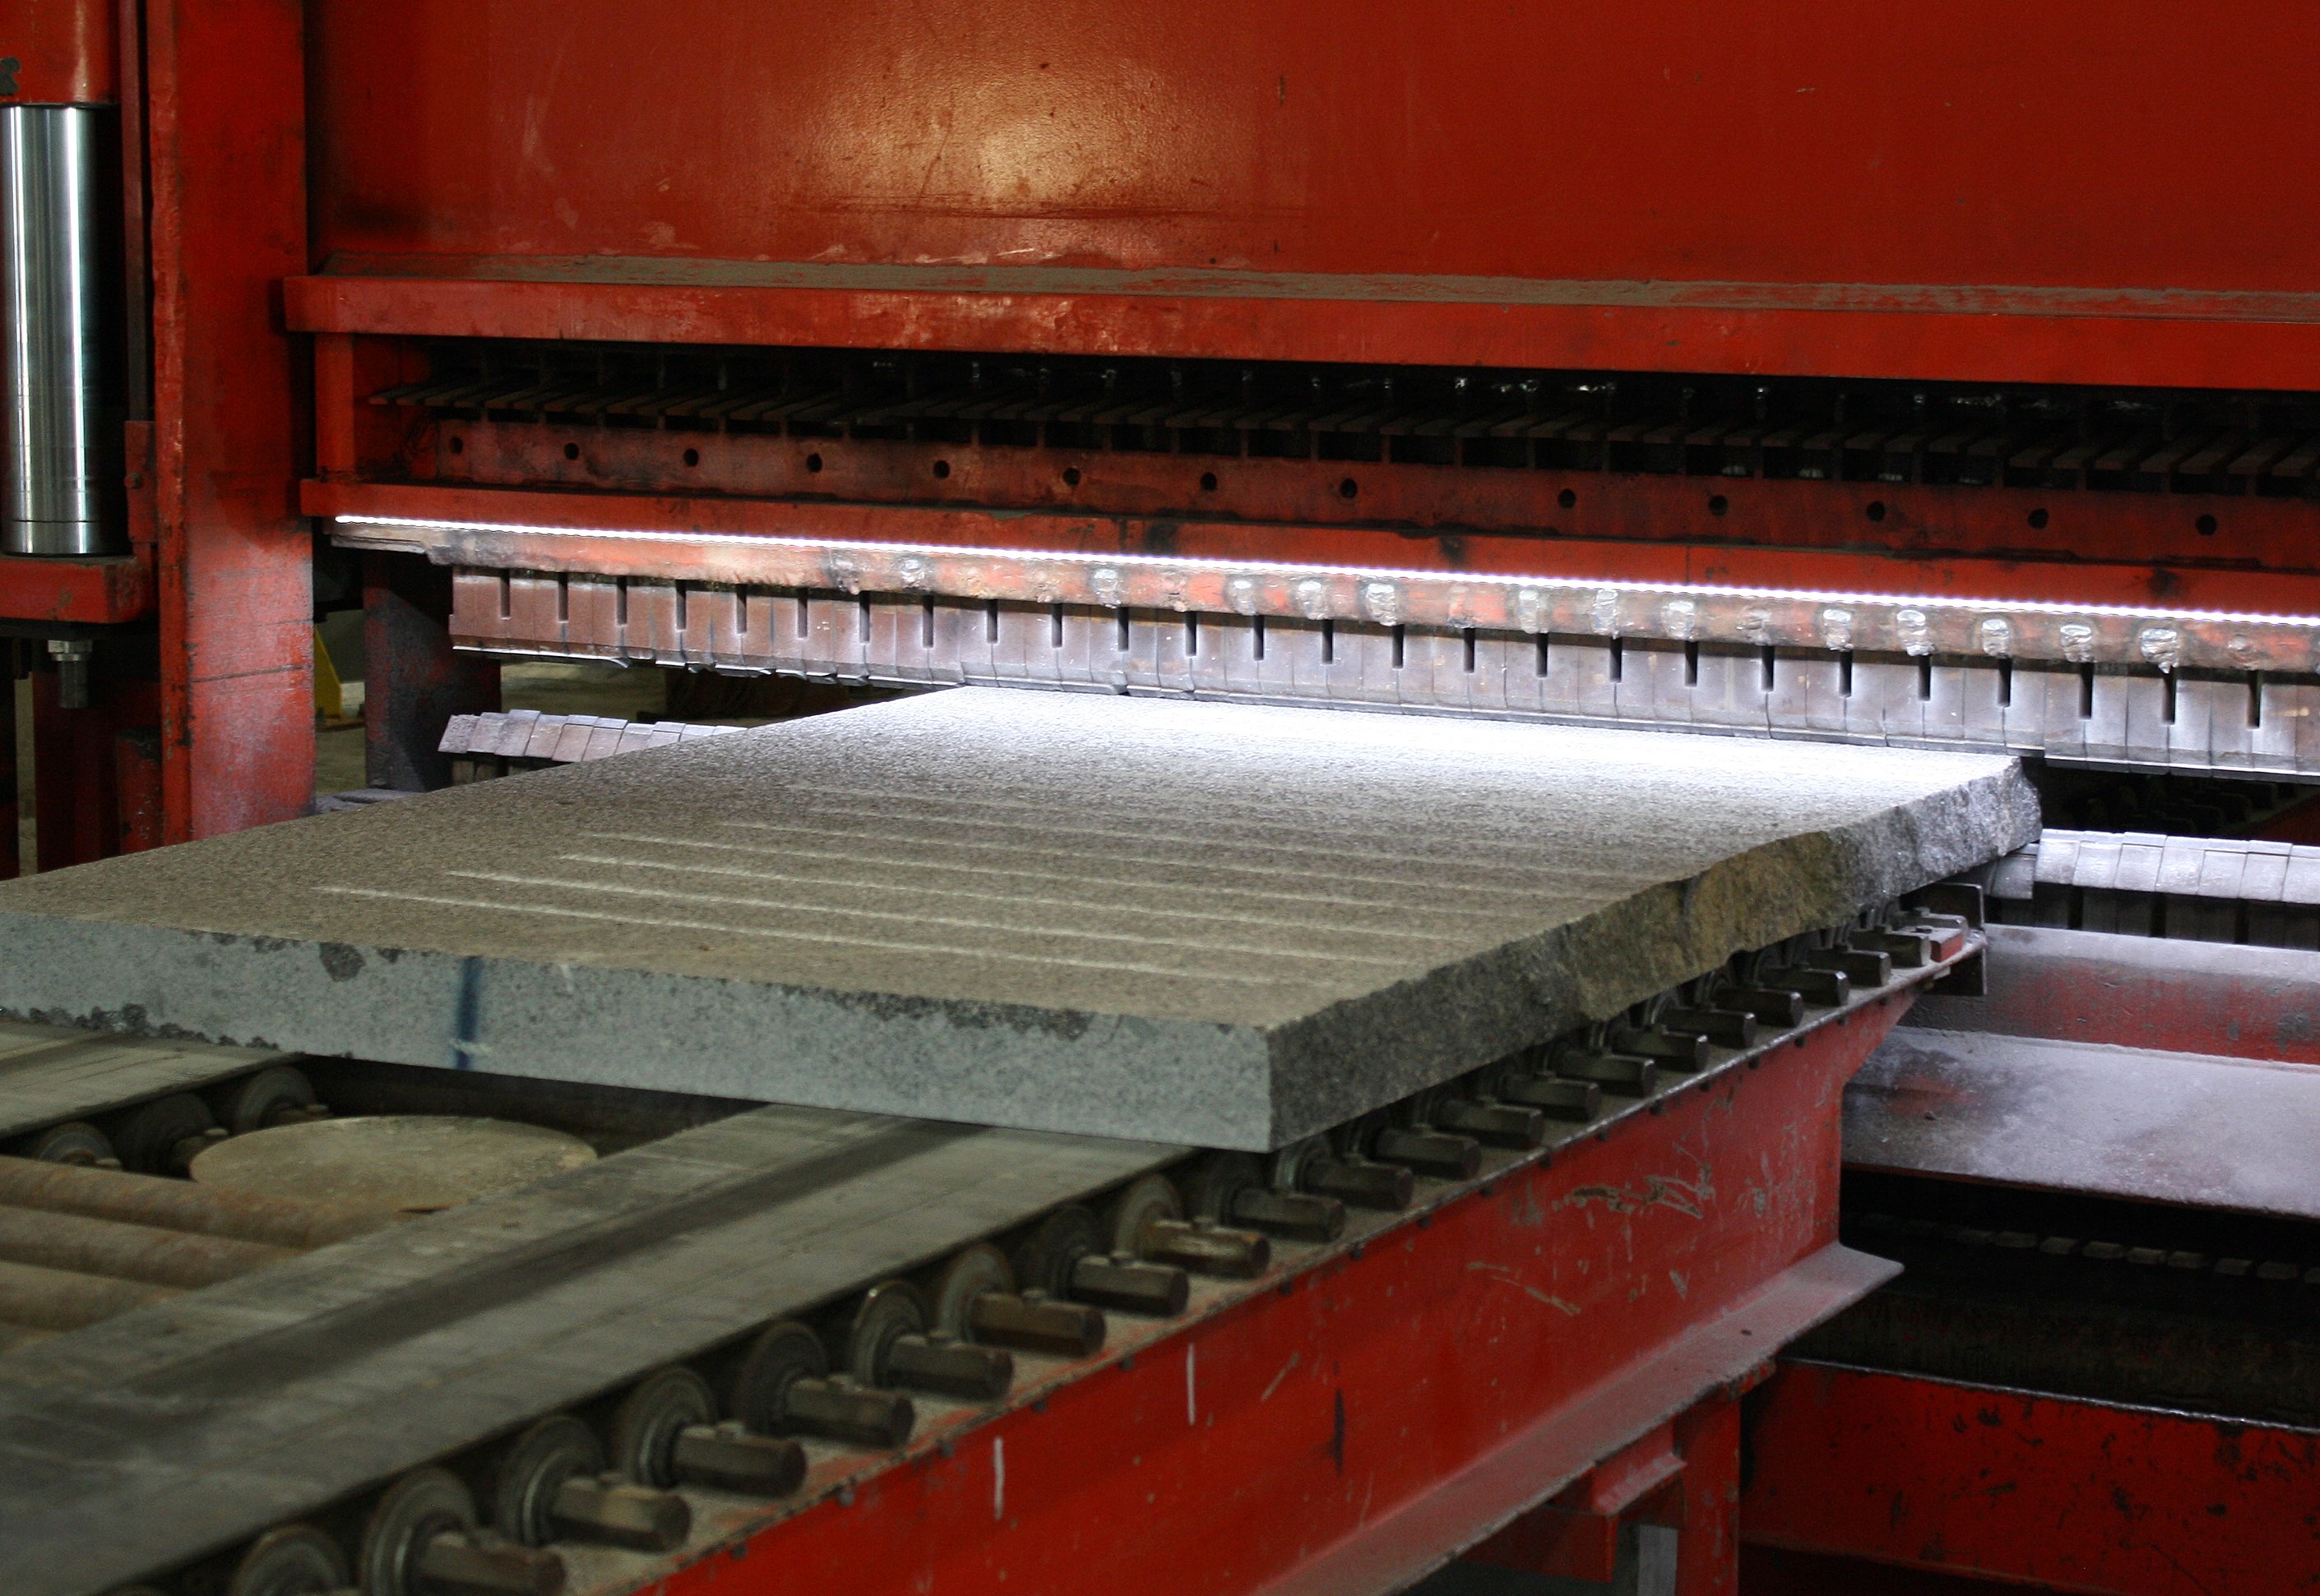
The most common method of producing these stone units is to start with a slab in a thickness of the net course height, and split strips from the slab with a hydraulic guillotine splitter.
Lengths of the stones are either reduced by the fabricator or in the field. Typically, lengths will be random to allow maximum yield of the stone product. Many of the larger fabricators will make this material as a byproduct, utilizing slabs that were initially destined for other product lines. There is nothing wrong with this practice, and it serves to reduce the cost of the product, but there is a concern if the slabs were previously finished. Because that finished face on the original slab will ultimately become the top or bottom bed of the stone unit, the mortar needs to bond to it. If the slab was originally a polished or honed surface, the ability of the mortar to mechanically lock to the stone surface is greatly reduced. For that reason, a smooth finish must be scarified, which is commonly done via flaming (for those stones that will take a flame finish) or sandblasting, but can also be done via mechanical abrasive means. For economy, this process needs to be done by the fabricator, as it is far more efficient to do it to the slab prior to splitting into strips than to do it to individual pieces in the field.
All stones have some degree of rift, or direction along which they are most easily split. Yet the direction that the guillotine is splitting the stone may not coincide with this rift direction.

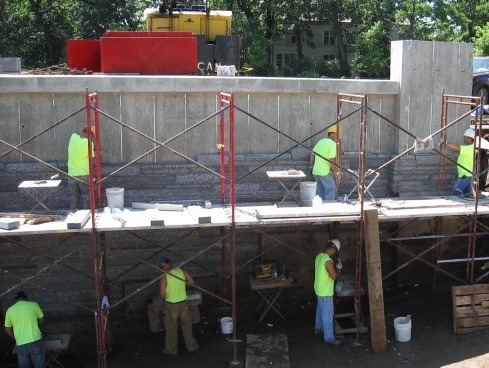
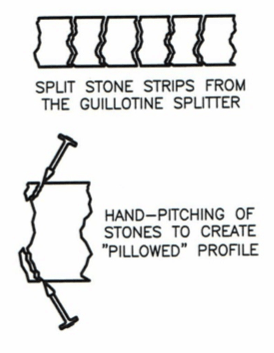
The profile of the split surface produced by the guillotine will be somewhat concave to somewhat convex. Aesthetically, it is preferred that all exposed faces be convex, as this produces a “pillowed” profile of the courses in the wall, and pending sun direction, creates a shadow line over the joints which helps accentuate the stone and not the joint. This is normally done in the field, and is a completely hand finished operation. It involves scribing a line on the top & bottom beds of the stone, and hand pitching with a chisel along that line (Ref Figure 1). In many cases, the ends of the pieces are also pitched. The greater the course height, the greater the projection profile that is required at the face of the stone. The Indiana Limestone Handbook includes a table of approximate projections to be expected for varying course heights. While the table was developed specific to Indiana Limestone products, it is probably applicable to most stone varieties, and is reprinted with permission here.

At this point, the stone units are ready to install. Just as in brick, there must be a deadload support upon which the first course is to be set. This support may be a concrete corbel, or a metal angle. Project specifications will dictate the metallurgy of the angle and the corrosion protection required. Industry consensus documents require that an anchor that penetrates the stone unit be stainless steel (in some cases aluminum or copper), but a shelf angle can be mild steel with corrosion protective coating. The weight must be relieved at no more than 20-foot intervals, although it is usually easier to simply provide deadload relief at every floor line. Thermal separators are frequently required when using heavy gauge steel angles to comply with ASHRAE energy codes.
Mortar specification for this application is nothing exotic. Most often, Type S mortar is used for the harder rock types (granite) and Type N mortar is used for the softer rock types (limestone). If, like the author, you have trouble remembering the sequence of standard mortar mixes, I was taught years ago to simply write the words “Mason Work”, and then cross out every other letter: MASONWORK. The remaining letters will give you the mortar types per ASTM C270 in decreasing order of compressive strength, yet increasing order of workability (It should be noted, however, that Type K mortar is no longer recognized in ASTM C270). Bond strengths of standard type S and N mortars on properly prepared stone surfaces can be quite high, approaching or even exceeding 100 lbs/in². However bond strengths can vary widely, particularly with surface prep and workmanship, so caution is advised.

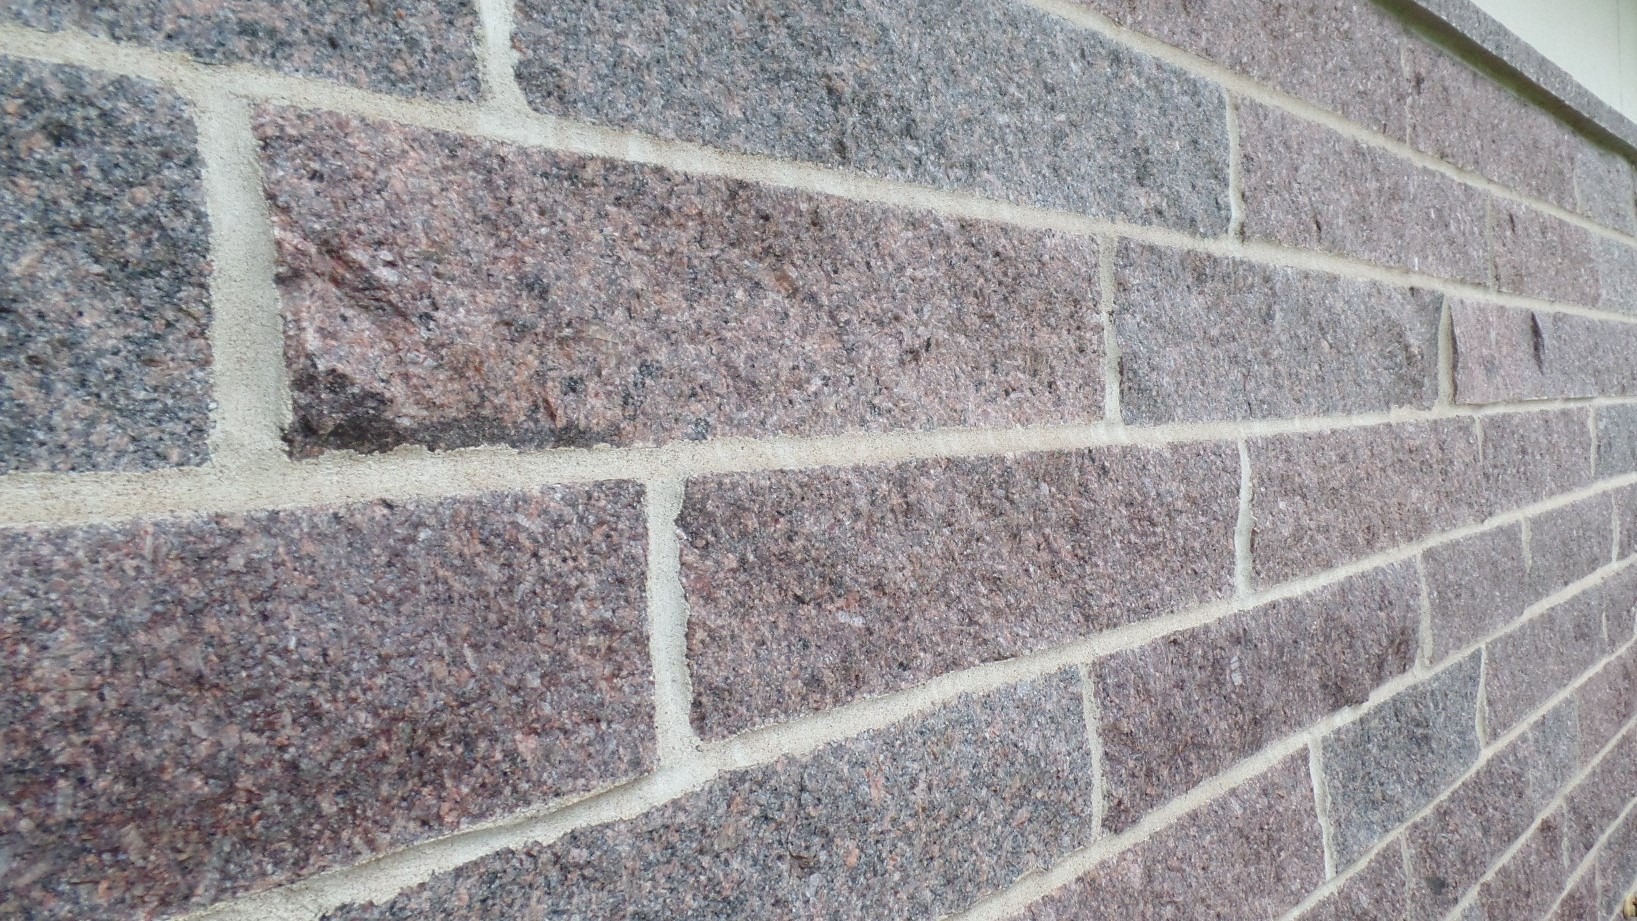 Two Installed Split-face walls. The project on the left featured all hand-pitched courses, creating convexity and shadow lines across the entire wall. The project on the right was not hand pitched and includes both convex and concave profiled pieces.
Weeps must be left in the bottom course, and any course where water cannot travel down the cavity (such as a continuous angle support). Weeps are commonly located at frequent intervals, typically 3’-0” to 4’-0” on center.
Anchorage of these systems, while similar to brick anchorage and using the same hardware in many cases, includes some complexities not found in brick. The use of corrugated brick ties is not 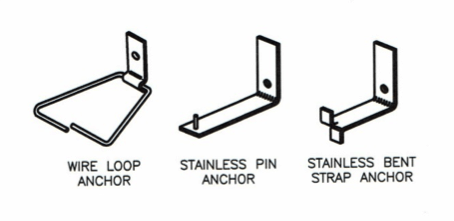 recommended. A “loop type” anchor is preferred, as it provides a better mechanical lock within the mortar joint. These are available in a variety of sizes to accommodate a variety of wythe thicknesses and cavity dimensions. They are also available with continuous rodding within the mortar joint, which are commonly required in seismic design areas. There are many manufacturers of these hardware components, and there are codes in addition to manufacturer recommendations regarding the maximum spacing between anchors and/or the maximum tributary area per anchor. Yet those recommendations have been developed for brick veneers, and brick enjoys a couple of advantages over stone in this regard. Brick is a highly porous surface and provides a much better mechanical lock between the mortar and the masonry unit, and typically has extruded holes in the bedding face that provide even more mechanical locking power. Stone surfaces do not have this, which in some cases can result in a significantly reduced bond strength between the mortar and the stone bed. Additionally, the stone coursing can be much higher than what is found in other masonry materials, so there is less opportunity for anchor placement.

In seismic design, the dead load of the stone becomes an issue, since it is significantly denser than brick. The only way to be certain of the anchor capacity is to test it, either in a laboratory setting or in a field mockup. While testing of the anchors isn’t all that complicated or expensive, it is regrettably not done that frequently. Often times on smaller projects, it is more economical to simply add additional anchors to safeguard against the capacity uncertainty rather than absorb the costs and time delay of testing. When stone course heights exceed 12 inches, it is an industry recommendation that a conventional stone anchor, which penetrates the stone bed be used in the top beds of the stones. When stone course heights exceed 18 inches, it is recommended that a conventional stone anchor, which penetrates the stone be used in both the tops and bottom beds of the stone units. These anchors can be ether of a “pin” or “bent strap” type. Pin anchors have an advantage in that it is easier to field drill a hole in the stone rather than cut a slot, although bent strap anchors are advantageous when using one anchor to capture both the stone below and above, since the sawn kerf in the stone allows some forgiveness for lateral alignment between courses.
Properly installed, wept, and anchored, these facades can easily be in place for a century or more. Longevity of service life is perhaps the primary reason to select natural stone in the first place. Split-face natural stone veneers will add beauty, rustic appeal, and a sense of permanence to any project.