Words: Steven Fechino, Engineering and Construction Manager, Mortar Net Solutions
Photos: Mortar Net Solutions and Steven Fechino
Jack arches have been around our entire careers, but it can be difficult finding people that enjoy laying them out. I realize that jack arches are more popular in different parts of the country, but having the understanding to calculate them could be helpful.
In order to calculate the cuts for a custom jack arch, you will need to create a cut template, it looks complicated, but honestly, it is very simple. This article has a lot of content and may seem to drag on, but before you know it, if you continue to read this, you will understand the simplicity of the arch. There are three very important pieces of information that you need to have to begin the process. I will put the technical arch terms in the article as I begin and call it in the field in parenthesis.
The information that you need to begin the jack arch layout is pretty simple and will lead the mason to other dimensions that will complete your template. First, you need to know the width of the rough opening. We use the term jamb when we talk about the rough opening side-to-side, but when working with arches, they are called reveals. Second, you need to know how many courses vertically the arch will extend. The jack arch will have full-width units at the extrados (top of the arch) and cut to a thinner width at the intrados (bottom of the arch or lintel location). Third, you will need to know what angle you will want the arch’s left and right ends to look like; this is called the skewback—the voussoir (arch brick) at the extrados (top of the arch). Working with the degree of skewback can simplify the building and cutting of materials for the arch.
Since most of us build commercially during the week and maybe side hustle a bit of residential on the weekends, this layout math of jack arches can be applied to whatever material you choose to install.
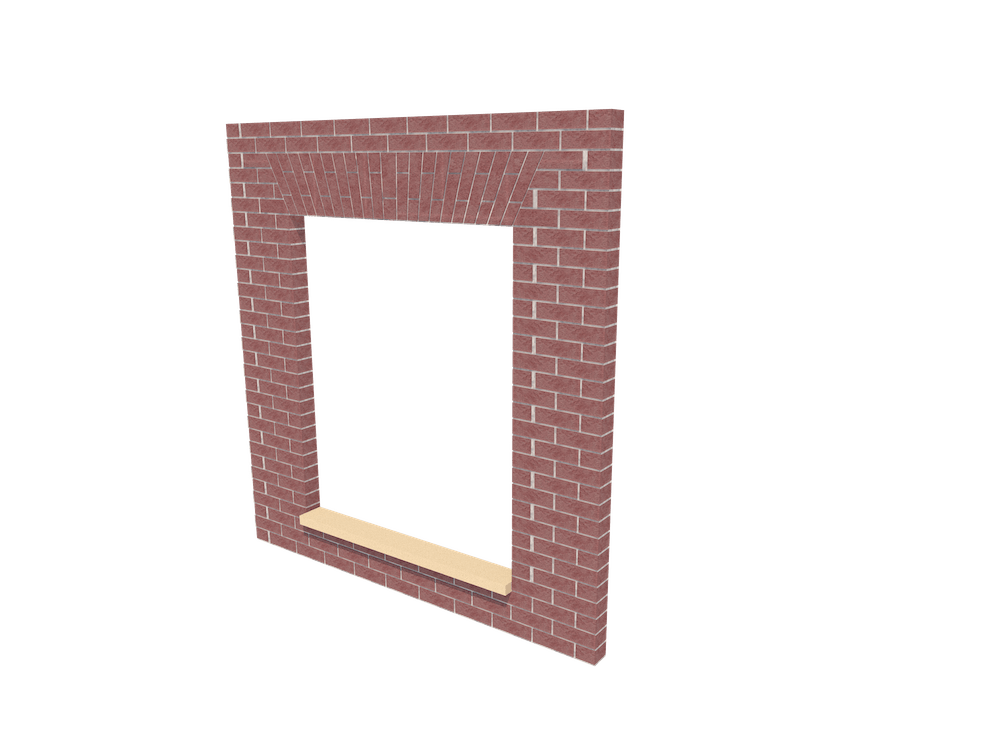
The example here is a commercial jack arch on a small building, for instance, a bank or a light commercial facade.
We decided on modular brick, 3/8 -inch joints, and four vertical arch height courses for this project. I know from my previous trial and error efforts I can draw out the different degree options of the skewback on cardboard or wood and extend it to the height that I want to extend my arch vertically in the facade. I know I need full brick at the extrados (top of the arch), and with a 48-inch rough opening, will have full brick widths at the top of the arch and workable cuts at the bottom of the arch.
It is easier to build an arch with an odd number of bricks; however, we cannot reasonably fit an odd number in this case. This will mean that the key brick or center brick will be exactly in the center of the arch.
Now we need to look at how to calculate the arch material; we will calculate the extrados (top of the arch) based on the intrados (masonry rough opening), the width of each of the skewbacks added to the intrados, the dimensions of modular brick plus one mortar joint for each brick. When all of this is computed, you will need to add one additional mortar joint to balance the arch, which is typical of all arches.
It is easier for me to use a calculator for this example because we will calculate tapered cuts on all bricks. So, I will convert all of my materials to decimal. Fractions are turned into decimals by dividing the top number into the bottom number, simplifying the math.
- Mortar Joint: ⅜ inch = 3÷8 = 0.375 inch
- Modular Brick: 2 ¼ inch = 2 + (1÷4) = 2.25 inch
- Modular Brick + ⅜- inch Mortar Joint = 0.375inch +2.25=inch=2.625inch
We will use 2.625inchesh as the voussoir’s width plus a mortar joint (arch brick plus mortar joint).
The jack arch, in our case, will be sitting on a lintel that we will not alter the calculations but will simplify the thought process because we will be on course with the facade bond. The jack arch will extend to the fourth vertical course of wall facade brick. The Extrados is where the jack arch Voussoirs (arch brick) extend to; for this example, we choose to go four courses. Four courses of the facade bond (running bond or English bond typically) of modular brick plus each mortar joint will be 2.625 inc/course x 4 courses = 10.5 inches above the lintel (the lintel also represents the Intrados of the arch or the bottom of the arch).
Typically, the skewback is anywhere from 60 to 70 degrees. The higher the skewback’s degree, the farther the strike point is from the arch’s bottom. The strike point is the point that will be used to pivot the arch’s width and be used to mark every brick used for cutting. The strike point is drawn from the left and right skewback; the closer to the intrados, the strike point is located to the bottom of the arch. When we design the template later in the article, we will then see how the skewback will look. By calculating the number of bricks at the top of the arch, we will automatically define the skewback angle. This is one way of doing it; there are several different methods.
To determine the degree of skewback, I generally have to do trial and error, as I mentioned, until I get it right; by that, I mean until I calculate full brick widths at the top of the extrados (top of the arch). In this case, I need to calculate an angle that will allow my 48-inch rough opening (intrados) plus the additional length to my extrados (top of the arch), X inches on the left and the right.
I know that the rough opening is 48-inches and that I want my skewback to be less than six inches wide on each side based on experience. When you look at jack arches, they seldom extend further than a brick; this is where the 60-to-70 degree skewback comes into play.
A 63-degree skewback was drawn on cardboard. As we mentioned, this was useful to see how far left and right that the archtop would extend once the skewback angle is determined. The 63-degree skewback will add 5.25 inches to each side of the intrados, making the extrados 10.5 wider than the intrados.
Here is an example: 48-inch rough opening + 10.5 inches = 58.5 inches
58.5 inches (opening at Extrados) ÷ 2.625 inches/brick and mortar joint = 22.29 brick, which is perfect because that means we have 22 full-width bricks with head joints included. We have 0.29 inches for the extra mortar joint required for balancing (actually, we are ⅛ inches off, and I know this can be bonded out).
To determine the brick’s dimension at the bottom course of the arch: 48-inch rough opening ÷ 22 brick/opening (determined at the Extrados or the top of the arch) = 2.18 inch/brick and mortar joint.
Here is where we need to adjust, we can tighten the head joints, this is a typical solution, or we can recalculate until we have a dimension for 22 brick and 23 head joints that will fit into the 48-inch rough-opening dimension.
23 head joints x 0.375 inches / head joint = 8.63 inches. Converted to the stick rule in your pocket = it is between ⅝ in ch and ¾ inch. So, use 8 and ⅝ inches for head joints. This leaves you with the following calculation: 48 rough opening inches = 8.63 inches = 39.29 inches (approximately 39-3/8 inches).
To calculate a more exact width for the cuts and the intrados (bottom of the arch) 39.37 inches ÷ 22 brick = 1.79 inches per brick (1-3/4 inch approximately).
The math is now done; we have what we need. We must make a template so the brick can be cut. I use ¼ inch plywood because it is much more durable than cardboard or poster board. It also can easily be stored in your bag or truck if multiple arches are required for the project. I also use sharpies. They have good sharp lines keeping the markings more accurate.
You will need a few items; a second person who does not talk too much would be useful here since it all comes together. A four foot by eight-foot piece of plywood, set of clamps, sturdy work surface of some sort, straight edge, markers, jig saw, drill, and a 16d nail (you can set the nail in the strike point to stabilize the marking process, definitely optional) are all useful in marking the template since we are using a 48-inch rough opening. Turn the plywood and mark out the opening.
Here are the steps to simplify the process:
- Draw a line 1-1/2 inches parallel or horizontal with the 96-inch side of the plywood; this will be the extrados (top of the arch)
- Draw a line 12 – inches parallel of horizontal with the 96-inch side of the plywood; this will be the intrados (bottom of the arch)
- Draw a perpendicular or vertical line 48 inches from the left or right side (48- inch side) of the plywood; this will be the center of the rough opening.
- From the left of the template, draw a perpendicular or vertical line at 24-inches and 72-inches; this will represent the jambs or reveals of the rough opening.
- You can now draw a 5-1/4 inch on each side of the jamb at the intrados; this will layout the extrados total width.
- Draw a line that extends from the top of the extrados to the intrados (follow the skewback angle) and down to the center of the masonry opening. The intersection of this point will be the strike point. This point needs to be the exact center of the rough opening and the key voussoir’s center (key brick). From the strike point, all template lines will be generated from this point on.
- Layout the facade coursing onto the template complete with mortar joint; it is easier if you draw the entire arch. However, you can draw only one half and duplicate the cuts. I do recommend if you do only one half of the arch, you mark both sides of the actual brick templates. I do numbers for the left and letters for the right, so I do not get them mixed up.
- From the extrados’ top, draw 22 evenly spaced ticks; this will be one head joint and one full-width modular brick. The measurement you are working with is 2.625-inches or 2 5/8 inches with an additional head joint on the opposite side of the layout for balance. All of the ticks on the extrados will connect to the strike point. Now you can start to see the voussoir (arch brick) layout.
- Once you have the voussoirs laid out, you can do the horizontal bed joints to look the best for the project.
- Once you have looked this over, stop and walk away for a few minutes, eat lunch, make some calls, or whatever. Come back and then look at it with fresh eyes. I have been known to make some big-simple mistakes, now is when you find them.
- Label all of the template pieces, so you know where they go, then take twice as many photographs of the template as you think you will need; trust me here.
- Take the jig saw and cut out the jack arch as a whole, just to make sure you have it going the way you want it. Take a minute and put it in place; if it looks correct, cut out the individual templates and fire up the saw table. You are ready to lay up the arch.
Here are the key words:
- Extrados- top of the arch
- Intrados- bottom of the arch
- Voussoirs- brick that make up the arch, I call them arch brick
- Skewback- this is the angle of the arch on the left and right sides.
- Striking point- this is the point in the center of the arch’s opening where all the voussoirs’ angle cuts (arch brick) originate.
- Center line- this is a drawn or string line that goes directly through the center of the arch and will split the keystone or key brick directly through the center of the unit. The center line can easily determine the accuracy of how you are laying the arch brick during construction.
- Reveal- this is the jamb of the rough opening.
- Springers- these are the brick (usually in running or English bond) that adjoin the facade brick to the skewback of the arch