Flashing and Drainage
By Jeremy Douglas
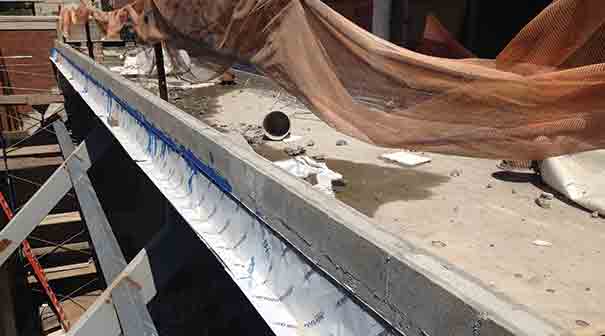
The flashing and drainage plane has always been a critical component of any cavity wall system, diverting moisture outward as it collects in the cavity space to the exterior of the façade through the weep openings. A failure in this arrangement can ultimately lead to degradation of wall components including mortar, lintels, non-stainless anchors and fasteners, and lead to a reduction of R-Value in certain types of insulation.
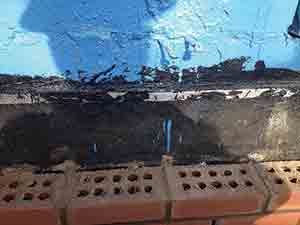
In a steel stud wall system, flashings help prevent excessive moisture from reaching beyond the sheathing, causing mold growth and deterioration of the batt insulation and interior wall board. Since infiltration of moisture poses the greatest risk to the long term integrity of a masonry wall, careful consideration must be given when selecting and installing flashing materials to ensure continued performance through the life expectancy of the wall itself.
First, we should understand what the codes require with regard to masonry flashings as these are somewhat ambiguous. To examine any masonry wall code, our first resource is usually TMS 402-13/ACI 530-13. In this code, flashing is referenced in a general manner:
- 6.1.5 General design requirements
- 6.1.5.1 Design and detail the backing system of exterior veneer to resist water penetration. Exterior sheathing shall be covered with a water-resistant membrane, unless the sheathing is water resistant and the joints are sealed.
- 6.1.5.2 Design and detail flashing and weep holes in exterior veneer wall systems to resist water penetration into the building interior. Weep holes shall be at least 3/16 inch (4.8 mm) in diameter and spaced less than 33 inches (838 mm) on center.
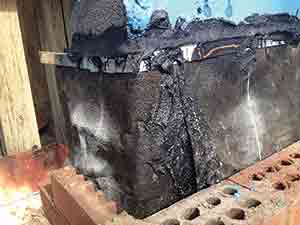
This provides the very minimum direction for the use of flashing and weeps as part of the overall building envelope, suggesting that if the sheathing is not water resistant, the backup wall must be kept free of moisture. The flashings and weep holes assist in this assignment, though minimum weep size at maximum spacing allowed by this code section would be considered inadequate for drainage or ventilation needs of the wall cavity by most of the masonry industry.
The 2012 version of the International Building Code also addresses flashing materials, in a slightly more specific manner, though meant to be applicable for many construction types other than masonry:
1403.2 Weather protection. Exterior walls shall provide the building with a weather-resistant exterior wall envelope. The exterior wall envelope shall include flashing, as described in Section 1405.4. The exterior wall envelope shall be designed and constructed in such a manner as to prevent the accumulation of water within the wall assembly by providing a water-resistive barrier behind the exterior veneer, as described in Section 1404.2, and a means for draining water that enters the assembly to the exterior.
1405.4 Flashing. Flashing shall be installed in such a manner so as to prevent moisture from entering the wall or to redirect it to the exterior. Flashing shall be installed at the perimeters of exterior door and window assemblies, penetrations and terminations of exterior wall assemblies, exterior wall intersections with roofs, chimneys, porches, decks, balconies and similar projections and at built-in gutters and similar locations where moisture could enter the wall. Flashing with projecting flanges shall be installed on both sides and the ends of copings, under sills and continuously above projecting trim.

While this code is still very broad, it does give us more of a directive. It provides some specific locations for flashing materials. It calls out for end dams. It also makes drainage a more imperative factor. Take the last part of 1403.2 for example: “and a means for draining water that enters the assembly to the exterior.” This now requires a drainage plane and flashing system in exterior walls where it may not have been typical before.
For instance, with lightweight manufactured or thin stone materials, it has been perfectly acceptable to apply metal lath to the exterior sheathing with nothing between them but a single layer of a common building wrap and to then adhere the stone directly. By this requirement of the IBC, if there is a possibility of moisture getting behind the veneer, we must provide for drainage, whether that is a double layer of building wrap or a full wall installed drainage plane.
What these codes do collectively imply about flashing and drainage is that:
a) Flashings need to be installed at the intersection of masonry and chimneys, walls, roof intersections, porches, decks, balconies, sills, above doors, windows, and other openings
b) Flashing must be properly lapped and sealed so it is completely waterproof
c) The flashing at a minimum must be made flush with the exterior of the veneer
d) Flashings will be present at the base of the wall, and over lintels and relieving angles
e) End dams are present where the flashing will no longer be continuous within the cavity
Another crucial component to the flashing system is the air or cavity space. This is addressed in another section in the Veneer chapter of the TMS 402-13 code that requires we maintain a minimum of a one-inch air space. This void serves many purposes, including ventilation and drainage which ultimately minimizes efflorescence. Many would argue, however, that a one-inch air space is insufficient in a masonry wall, due to construction tolerances. Tolerances of +/- ¼ inch are allowed for both the backup and veneer walls across 10 feet. Consider then what a one-inch air space becomes when the backup wall moves outward ¼ inch and the veneer wall moves inward ¼ inch. Fifty percent of the air space is lost, and mortar bridging from the veneer to the backup becomes a certainty. Most industry professionals recommend an air space of two inches, or at the very least 1.5 inches. This provides the mason with more room to work and less constriction of the cavity wall when moving in and out of allowable tolerances. Provided adequate weeps are installed at shorter intervals, a larger cavity also helps to equalize pressure levels to that of the exterior, keeping air pressure in the wall cavity lower.
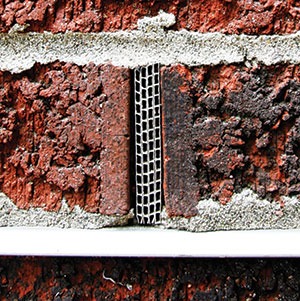
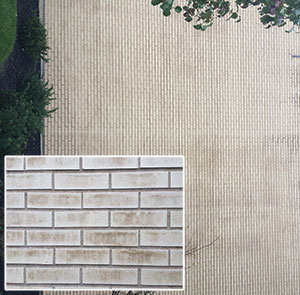
Weeps play a vital role in the performance of the drainage system as well, but should not be thought of solely as a drainage device. While the primary function of a weep hole had been to allow egress of water and moisture within the wall cavity, they also provide essential ventilation and air circulation in the wall, and help to equalize pressure between the cavity and the outside air. Good ventilation behind the brick helps to prevent a whole host of issues, including efflorescence and various types of brick staining.
In order for weeps to drain and ventilate adequately, they must not only be free and clear of debris, but they should be of adequate size and spaced closely. A vent the full height of a standard head joint will allow for more than three-times the airflow than the traditional 3/8-inch round weep tube, assuming of course that the tube remains open. In today’s cavity walls, we are also installing the same weep devices at the top of the wall section to promote ventilation and pressure equalization, which closer spacing of these devices helps to balance. This is why rope weeps are inadequate and should not be used in our walls today, as they provide no open drainage and do not allow for any airflow.
What is not addressed anywhere in our codes are items such as material durability, recommended installation methods of flashing materials, or the use of drip edges at the veneer face. For these general requirements or good practice topics, we look to technical papers written by our advising entities like the Brick Industry Association or the International Masonry Institute, or, of course, to the various manufacturers provided their track record is long in keeping with good masonry practices.
The matter of selecting a flashing material for a masonry wall today should be given ample consideration. The Brick Industry of America’s Technical Note 7 suggests that we are to “Select flashing that is waterproof, durable, UV resistant and compatible with adjacent materials,” and “It is suggested that only superior quality materials be selected, since replacement in the event of failure may be expensive.”
While both of these statements are completely true, the one consideration that needs to be given above all else today is compatibility of material adjacencies. We can no longer simply look to the performance expectation of the flashing material, but have to consider everything it touches, and respectively everything that touches it.
As an example, most air or air/vapor barriers today are polymeric in their composition. This typically requires the use of compatible sealants like silicones or urethanes. If we were to simply recommend the use of the same copper composite flashings we have used consistently over the last several decades, those sealants would not be able to adhere to the flashing material. Conversely, the mastics used for lapping and sealing those asphalt-based flashings are typically petroleum based and contain solvents, which likely will cause damage to the polymeric barrier material down the road. The same consideration should be given to the self adhering flashings that require solvent based primers before installation.
These concerns have brought about some changes to flashing materials over the last decade or so. In many cases, asphalt coated copper composite flashings have shed their asphaltic layers for a polypropylene film, which replaces the standard fiberglass scrims in helping to strengthen and support the copper foil. Polypropylene also allows for better adhesion to many types of sealants, and can be coated with special additives to allow for a stronger adhesive bond, or also for UV stabilization.
In shedding the asphaltic component, this also eliminated a significant amount of weight from the flashing rolls, which meant they could be manufactured in longer lengths. Longer, lighter flashing rolls ultimately mean longer continuity of flashing runs without lap joints. Of course, fewer lap joints in the end mean fewer opportunities for flashing failures.
The same manufacturing process has been applied to a lightweight, flexible stainless steel foil. The advantages of using stainless steel in a masonry wall are numerous. First, stainless steel is common to drip edge plates, termination bars, and fasteners that are already being used in the same proximity as the flashing material, so we eliminate the possibility of galvanic corrosion in the wall. Also, stainless steel is much more cost stable than copper.
Consider this: when a mason contractor calls for a cost on a large amount of copper flashing to bid a job, then four to six months later is actually awarded the subcontract, the price of a standard copper flashing can rise as much as 40 percent. Stainless steel in foil form hasn’t moved much more than 5 percent in the last few years. But more importantly, for a cost equal to or less than that of a copper composite flashing, a comparable flexible stainless steel flashing’s puncture resistance is 20 percent greater and its tensile strength is doubled.
Product to WatchFlash Trac Flashing System |
| The Flash Trac Flashing System is an answer to many of the headaches that may come with installing masonry veneer to exterior walls with spray-foam insulation. The Flash Trac uses a flashing wall bracket that is placed on the wall prior to the application of spray foam insulation. The wall bracket remains on the wall until the brick or block is to be laid. The flashing is inserted into the receiver of the wall bracket after the spray-foam insulation has been applied, and the retaining rod holds it securely. This process allows for an even coat of spray-foam insulation to be applied without damaging the flashing. The Flash Trac Flashing System is effective, easy to install, and minimizes mistakes.
System advantages include easy installation and time savings; membrane application when the mason is ready to lay brick and not in advance; straight and even installation; the membrane is allowed to perform as intended and reduces mistakes; and the spray-foam operator is allowed to work unobstructed or impeded by the membrane. For more information, visit www.heckmannanchors.com. |
Changes have also recently occurred in the way self adhering flashings are manufactured. Until recently, most of these “peel and stick” membranes have been comprised of between four mils and eight mils of extruded polyethylene and between 32 mils and 36 mils of a rubberized asphalt adhesive. This technology has been left relatively unchanged over the better part of the last 30 years, but it has not been without its setbacks.
The major problem is that polyethylene film by itself does not provide a surface that is easy to adhere to or to allow for the adhesion of other materials. Aside from poor adhesive qualities for sealants, polyethylene films do not allow for easy lamination to the rubberized asphalt component. When placed in an environment where we have extreme fluctuations of temperature and humidity, the course to delamination of these two components is easily set.
Newer self adhering flashings typically use much heavier membranes, up to a full 40 mils in thickness, and they may use string supported or woven films that add tremendous strength and dimensional stability to the membrane. New manufacturing capabilities also make use of adhesives that have higher melt temperatures than rubberized asphalt, which prevents any adhesive leaching from the masonry joints when the wall is susceptible to heating beyond the rubberized asphalt’s melt temperature. These newer adhesives also retain better viscosity and elasticity than their asphaltic counterparts do, which tend to harden, shrink, and crack, in the very same manner asphalt performs on a roadway.
With the introduction of air/vapor barrier systems, there has also been a significant change in the way flashings are installed on a C.M.U. backup wall. The term thru-wall flashing indicated the flashing material was laid into the mortar of the bed joint on top of the second course of block backup. This type of installation is no longer practical, as flashing installed prior to the air/vapor barrier materials will likely interfere with the continuity of the later applied barrier system.
Instead, all flashings should be installed at the same time the brick is laid by attaching them to the backup wall with a termination bar. This also allows for the flashing to be left off the wall for extended periods before the brick installation where it is susceptible to weather and other damages common to the construction practice.
Because there are so many products available for us to choose from, and because the adjacent materials in the masonry wall are in a perpetual state of evolution, it is more important than ever to thoroughly vet the materials we are using and understand how they are to be installed, taking particular notice in how we install the interfaces of adjoining systems or products. While flashing installations may have seemed routine or standardized over the last several decades, they should be looked upon as anything but that today.
Jeremy Douglas, CSI, CCPR, is the Director of Architectural Services for Hohmann & Barnard and has nearly 20 years of experience in the masonry industry in addition to working with various types of veneer systems. Jeremy has written dozens of seminars on the subjects of moisture control, building envelope, reinforcing and anchoring, and masonry restoration.
