Cleaning is usually carried out as the final step when building new masonry, removing mortar smears, grout spills, and other construction-related stains. Dirt, pollutants, biological growth, paint, and graffiti is removed from existing masonry to improve its appearance and maintain long-term performance. Cleaning is also required by Code (Section 3.8 of The Masonry Society Specification for Masonry Structures (TMS 602-16)), which further prohibits the use of acid or caustic solutions (Section 2.5.1) “unless otherwise required” by project specifications.
Cleaning can improve appearance and long-term material stability, if conducted properly. However, incorrect cleaning practices are often a significant cause of damage to existing masonry walls, causing efflorescence, etching surfaces and surrounding materials including glass, dissolving lime-based mortars, and leaving stains on sandstone and limestone. Cleaning also tends to open the material’s surface pore structure and change masonry texture and color. Understanding the cleaning process is an essential first step in properly cleaning masonry construction.
Masonry is cleaned using solvents or physical methods.
Solvent-based cleaning
Solvents including water, acidic or alkali solutions, and hydrocarbons are used to loosen, dissolve, or extract stains including mortar smears, grout spills, dirt, paint, and graffiti. Cleaning solutions containing acids are very effective for cleaning masonry, dissolving the calcium components present as cement and/or lime in masonry mortar, and grout. Acids will also dissolve concrete block and calcareous stone including marble and limestone. Used incorrectly, acid cleaning will also increase efflorescence potential by converting insoluble salts into water-soluble compounds.
Physical cleaning
Physical methods including scrubbing, abrasive blasting, and high-pressure water spray loosen surface deposits but also have a tendency to remove part of the base material. Abrasive methods remove a thin layer of the underlying material and are particularly harmful to soft brick, historic lime-based mortar, glazed finishes, carved surfaces, and soft stone. Use softer blasting media including ground nut shells, sponge particles, baking soda, or dry ice for sensitive masonry cleaning projects.
Cleaning Practices
- The first step is to understand the materials involved and the purpose for cleaning.
- What are you cleaning? Is it paint, dirt, mortar, or grout? How long has it been on the surface? Aggressive methods are required for cured grout and mortar deposits, but many stains can be loosened by water alone.
- What is the substrate? Brick, block, cast stone, or natural stone? Limestone, marble, and travertine, for example, are dissolved by acids.
- How clean is clean? Work with the client to understand the reason for cleaning and their expectations for the final appearance. Cleaning objectives should concentrate on improving appearance, but, with older buildings, trying to clean to a “like-new” appearance can be difficult and damaging.
- Cleaning contractor qualifications
You need to make sure your cleaning contractor has good experience not only with masonry projects, but specific to the types of materials involved. Different equipment and cleaning solutions are needed for different materials, and special expertise is required for sensitive construction including soft stone, block with integral water repellents, and historic masonry. The cleaning contractor should also have a good handle on local environmental regulations and how to clean in a way that is safe to the building, adjacent materials, and cleaning personnel.
- Cleaning trials
Test different cleaning materials and approaches at small areas to figure out the best approach. Solutions are left on the wall to test for the optimal dwell time and to see how the cleaning changes appearance. Your client can see the effect of different cleaning approaches firsthand as an aid in choosing the final cleaning materials and methods.
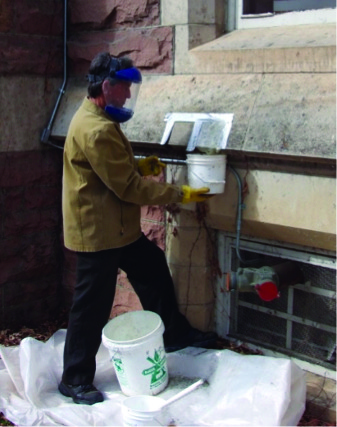
Sample cleaning trials at historic stone masonry
 Cleaning the sample panel
- Timing
Clean at the right time. Clean a new wall too soon and you will damage the mortar joints. Wait too long and aggressive cleaning will be needed to remove mortar smears. Clean grout spills immediately with a water rinse, and remove heavy mortar deposits at the end of each day by brushing or scraping with a wooden paddle, carborundum stone, or rubbing with a broken piece of block. The best time to clean new masonry is at an age of about 7 days.
Minimize efflorescence potential by cleaning walls in warm, sunny weather, when they will quickly dry. Use water-based methods only when the temperature is above 40 degrees to avoid freezing damage. Wet walls can take 7 days or longer to dry in cool weather.
- Clean the right way
- Pre-wet the wall before applying cleaning solutions. This ensures that the cleaner stays at stains on the wall surface, rather than being absorbed by the wall.
- Apply cleaning solutions with low pressure, in the range of 30 to 60 psi. Spraying cleaner onto the wall with high pressure will force it deep into the wall.
- Work in thin, vertical strips. Don’t let the wall dry out before rinsing.
- Leave the cleaning solution on the wall for a dwell time of 3 to 5 minutes, loosening heavy deposits by scrubbing and brushing. Scrub the units, not the joints, to avoid damage.
- Rinse thoroughly from the top down, to remove all traces of the cleaning solution.
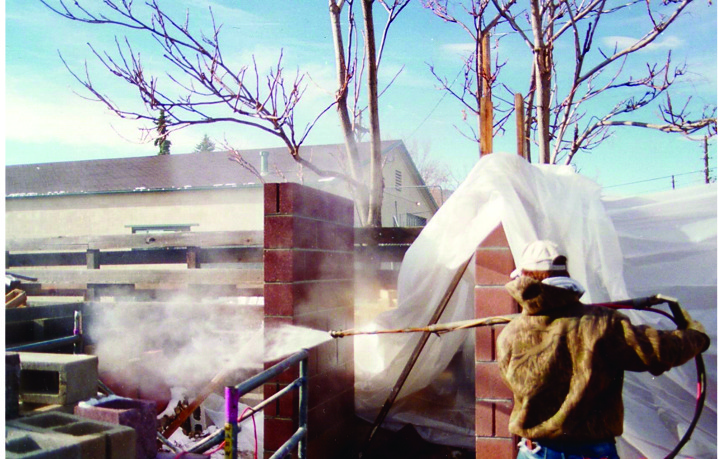
- Avoid high pressure cleaning equipment – above 400 to 600 psi – which may void your supplier’s warranty and can damage brick and block. (See Figure) If using pressure washing methods, limit the pressure to 300 psi, use a water flow rate of 1 to 8 gallons per minute, and a fan-tip nozzle with a 30-degree spray pattern. Keep the nozzle at least 12 inches away from the wall, and never use a needle-tip spray nozzle.
High-pressure cleaning will change your walls’ appearance, eroding brick and block, and leaving wand marks.
Tips and Tricks
Use Type N mortar whenever possible. The lower cement content makes it easier to clean than Type S and Type M.
Use mortar color similar to block color. Mortar smears will be less visible, and cleaning is reduced or eliminated.
Practice neatness on the jobsite. Avoid grout spills, and dry brush walls daily to remove mortar before it sets. Sweep or turn up scaffold planks each night to keep rain from splattering mortar debris onto the wall.
Get help! Some suppliers will come out to your site to help understand the materials involved and what type of cleaner will work without damaging the base material.
Use the gentlest method possible to limit damage and changes in color and appearance. Use low-pressure water and scrubbing with detergents for initial trials. Proceed on to medium pressure water, chemical methods, and abrasive methods only if necessary.
Improper cleaning (especially with acids) is a primary cause of efflorescence. Use gentle acids (citric or acetic acid) rather than muriatic or hydrochloric acids. Better yet, don’t be a chemist – use commercial cleaning solutions made specifically for masonry.
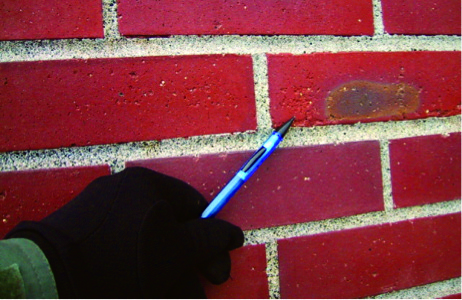
Run your finger along a newly-cleaned mortar joint. If sand trickles down the wall as you rub the joint, the cleaner may have used an aggressive acid cleaning solution, dissolving cement and lime binders at the joint face.

Aggressive acid-washing dissolved cement paste at the mortar joints, opening up separations at the mortar/brick bond line.

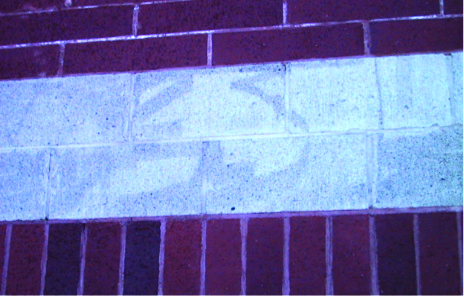
Properly cleaned joint, with cement paste and striking lines remaining at the joint face.