After severe flooding from Hurricane Harvey, the Haine family has a happy home once again.
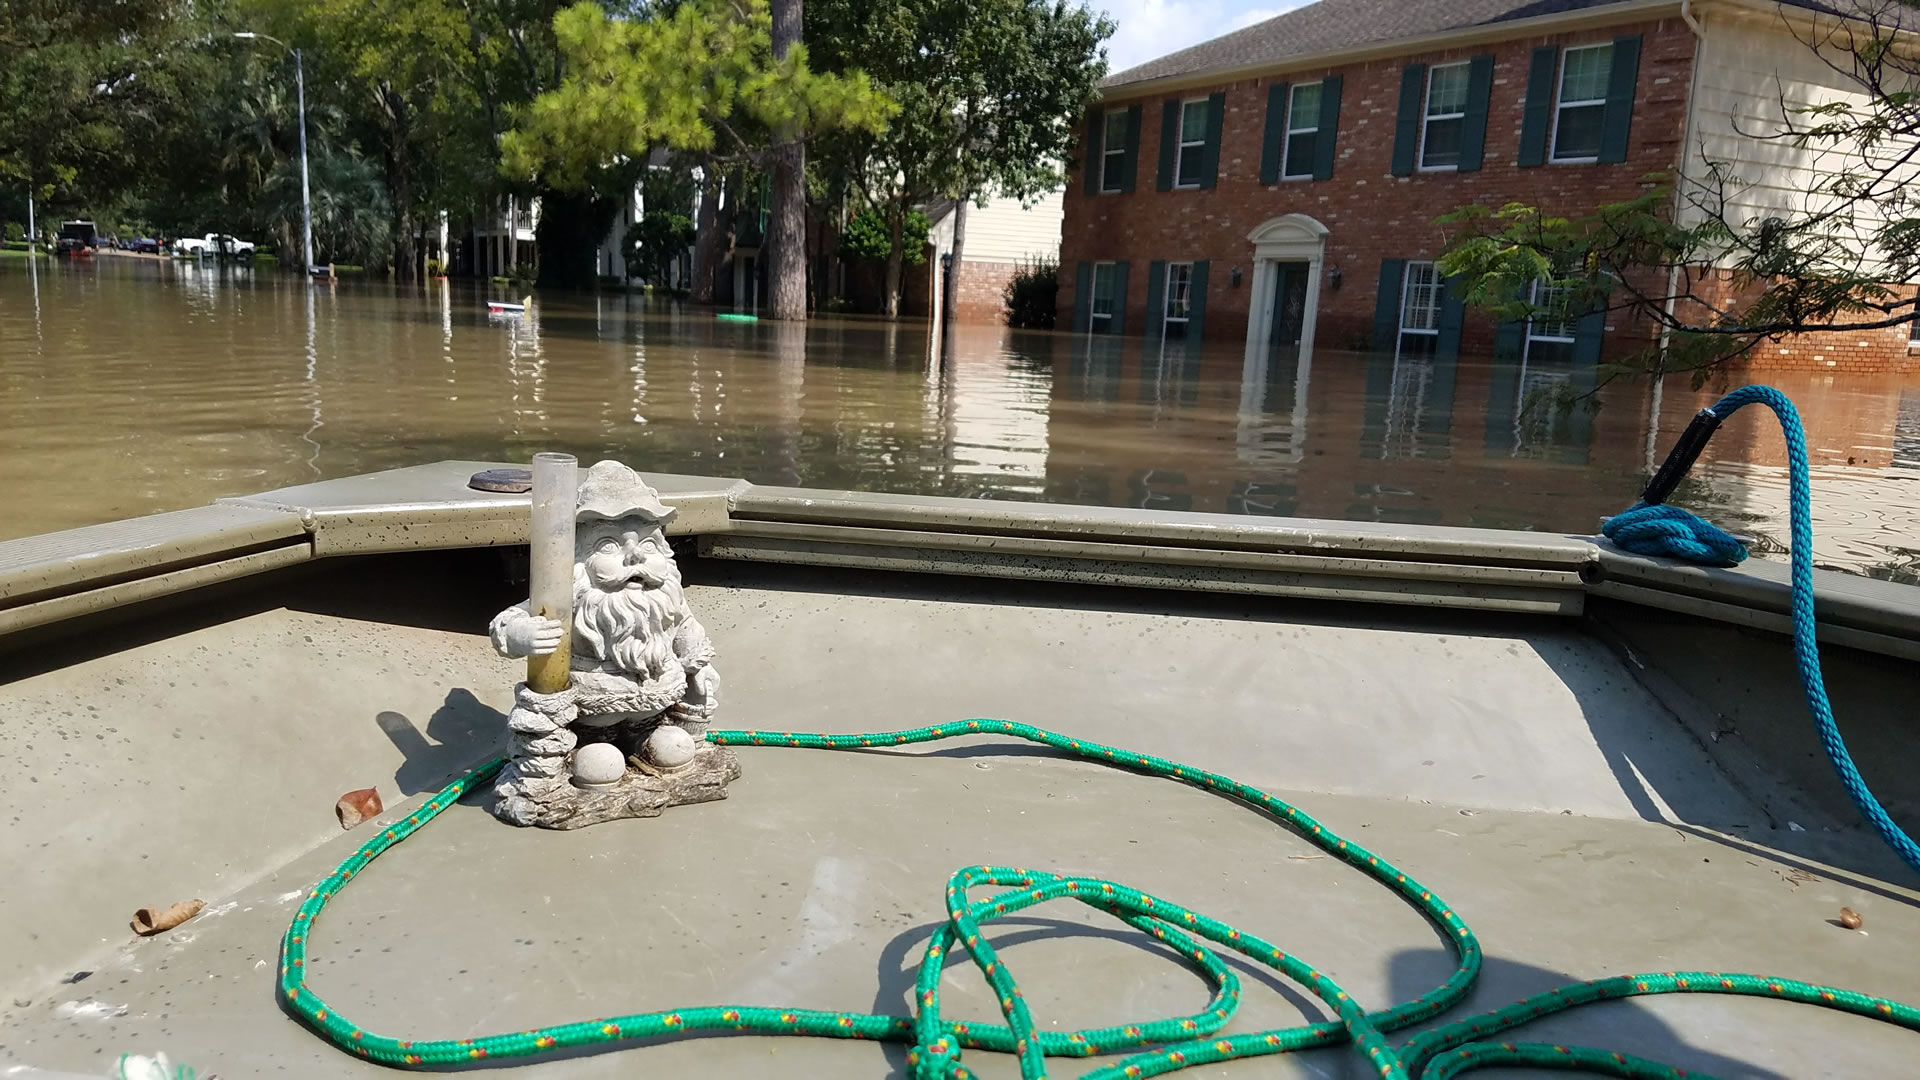
In August 2017, Hurricane Harvey hit the southern coast of the United States. After four days of heavy rain, the reservoirs to the north and west of Houston were filled to capacity, forcing the Corps of Engineers to perform upstream storm water management techniques. As some might say, they “opened the gates.”
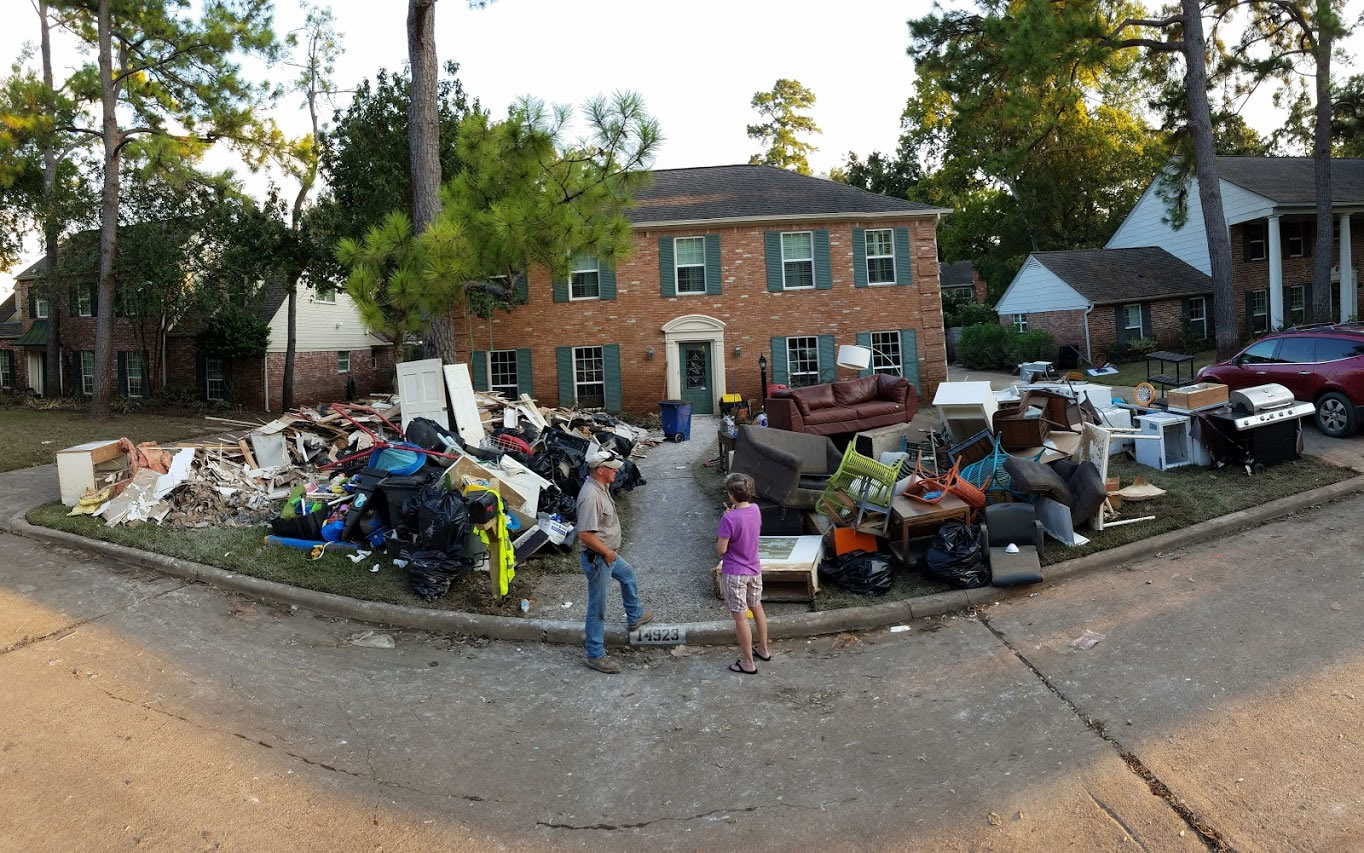
Water flooded many areas of the Houston, including the residence of Chris Haine, a former architect working in real estate. On the morning of Aug. 28, the flood waters took over, and the Haine family had to vacate, unable to return for 13 days – a long time for one’s home to be filled with water.
The mucking of the residence was extensive. Since the Haine residence sustained about 48 inches of water on the first floor, nothing was salvageable. With the Haine family’s belongings removed, demolition could begin. The process for the repair was a group effort between Chris Haine; his friend, Michael Knight, AIA, a local closed-cell foam insulation installer and Mortar Net Solutions; who assisted in planning the process.
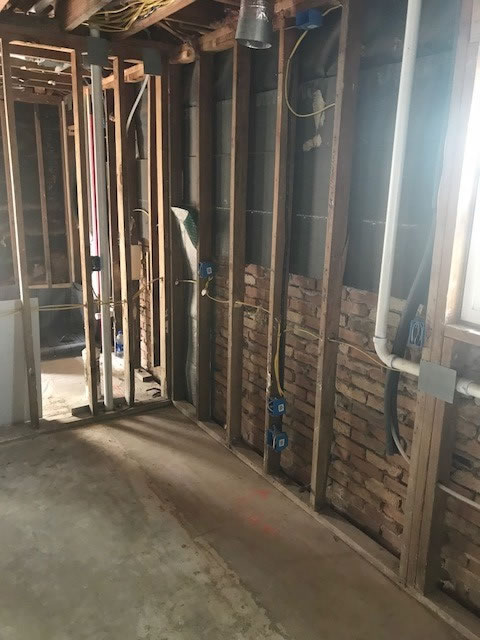
The plan was to rebuild from within, so a discussion began about using the entangled mesh as a cavity, creating material placement at the interior face of the veneer. This would be supported by the existing stud wall and commercial-grade, closed-cell foam. It was important to create samples, which was done with the assistance of the insulation installer using different mesh configurations and foam installation pressures. The installer would then know exactly what was required to give the Haine residence the best wall section possible.
Once we were confident that this installation would create a manageable air space to allow air and water to move behind the veneer, the plan moved forward. Mortar Net Solutions developed a five-step plan, instructions for which are available as a free download for anyone who can benefit from this option, https://mortarnet.com/wallnet-f/wallnet-f-demolition-installation-instructions.
Since materials found in the existing structure were completely saturated, they needed to be removed, including the interior drywall, polyethylene plastic, batt insulation and exterior sheathing. Removing the materials from the inside was challenging. However, the existing brick façade could remain, and the house could be locked at the end of each work day to secure tools and personal belongings.
The brick ties remained but were loose at the stud. This connection between the tie and the stud would be tightened when the closed-cell foam was installed. Once the interior envelope materials were removed, the final step in debris removal was to remove the mortar droppings from the base of the wall. This time-consuming task was important to the success of the design. The droppings were removed, so a flexible flashing and weeps could be installed at the base of the wall. This completed the proper weeping of the cavity.
Installing flashing in such a small cavity with the existing wood studs was possible using a Prosoco product, FastFlash. This gunnable material can be troweled into the base of the cavity to form a flexible flashing. WeepVents™ were installed in the head joints directly at the FastFlash level to prevent any accumulation of liquid in the cavity.
Local codes required additional blocking to the stud wall. Stability of the wall with the use of commercial, closed-cell foam to a thickness of 2.5 inches offered the same properties as ½-inch sheathing board. This information is important for the inspector to know when deciding on additional bracing. At this point, inspections of all water, electrical, communication and vacuum lines found within the walls were performed.
Before he could begin his final steps, Chris Haine had to get a certification showing that his studs and framing members were dry and mold free. The Haines family ran fans continuously for two months, in order to obtain a written certification from a Houston-based testing firm. The next step was to assure the building inspector that the submitted plan was the same under construction. The inspector was impressed with the repair and approved all inspections.
The build back is ready to begin. Mortar Net Solutions WallNet F was chosen for this repair, based on a successful mock up. It was determined that the pre-cut material would fit and attach easily between the studs and around the existing brick ties. The ties needed to be inside of the mesh for the closed-cell foam to fill the gap between the tie and the stud, re-establishing a secure connection of the tie to the substrate. With all of the mesh in place, the installation of the closed cell could begin. With the closed-cell foam in place, the final steps in installing the drywall, tape and joint compound, primer, and paint could be completed.
This repair, based on local comparison, was about one-fifth of the expense of removing and replacing the wall from the outside when the brick was removed. Haine did not have to rebrick, landscape, or secure tools and personal belongings away from the site during construction. He also didn’t have to worry about additional rain storms saturating his framing. He said that, while some tasks were tougher, some were the same. But the savings was definitely worth it.
Words: Steven Fechino
Photos: Chris Haine