??May 2014
Flashing and Drainage
Flashing: Taking the Time to Make a Difference
 |
|
| Photo courtesty of IMI |
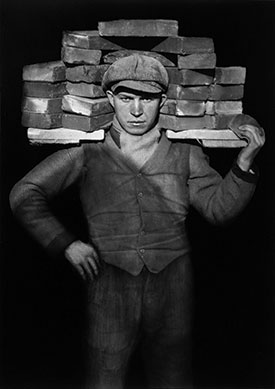
Flashings create the path for moisture to migrate out of the cavity or multiple wyths of a wall. When I was younger, working in the residential market, the closest thing to flashing was the metal termite shield that was placed on the nailer on top of the concrete masonry units (CMU) of the foundation.
As technology progressed and the work of masonry consultants like Wiss, Janney and Elstner Associates and Colin Munroe became well known, the concept of through-wall flashing became much more popular for many of the projects constructed in the 1970s and thereafter.
In the 1980s, flashings that I worked with were thin vinyl materials, a PVC material that had some sustainable material problems. Unfortunately, it was well known at one time in the commercial industry, and it gained a bad name. The PVCs of today are thicker and UV stable, and will not break down or cause problems. Concerns from the past should not be a consideration today if this is your desired choice for a membrane material.
York Manufacturing manufactured the thin copper flashing that had asphalt emulsion on one side and brown craft paper on the other. I used this particular flashing on hundreds of jobs without any problems; it was our company’s standard. As developments became better known, next in my flashing education, was the end dam.
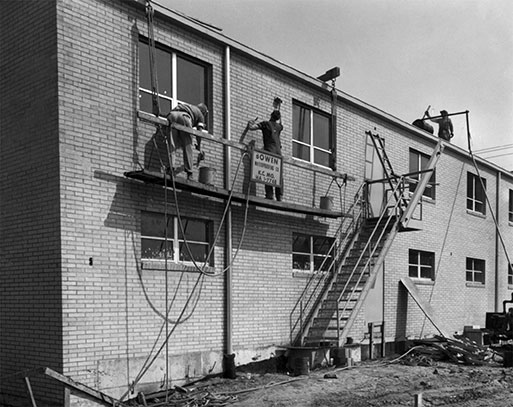
Photo courtesty of PROSOCO
Enter end dams
At first, the end dams were made by folding a piece of flashing and using mastic to stick it together. End dams are considered critical to the success of most of the window head and window sill flashings. The function of the end dam occurs when it is placed under the edge of the flashing and extends to the face of the wall. Water that accumulates on the flashing then is prevented from pouring over the edge of the flashing into the collar or cavity joint. Once the ends of the flashings are blocked off, water has nowhere to go but out through a weep joint.
Today, end dams typically are made one of several ways, from a thin-gauge stainless steel that easily fits in the head joint and extends from the substrate to the face of the wall and compatibility with the stainless steel is generally not an issue. End dams typically are set in a bed of sealant to prevent any moisture from migrating under the dam and into the living space.
Another popular way to construct end dams as well as inside and outside corners is the PVC cloke (as referred by some). These are very important as they create a simple seal at the corners of your building and at the flashing. They usually are less expensive to purchase and install than trying to form fit a membrane, term bar and sealant into a little corner area. The corner boots should extend to the top of the flashing or above, and be completely sealed to the substrate.
Mortar Net Solutions has developed PVC corner components that are the industry’s tallest at 14 inches, with the added benefit of Elvolee KEE within the mix of the PCV. The Elvolee KEE is a molecule that keeps the flexibility of the PVC component for the life of the building.
The terms of term bars
Term bars were not used early in my career as we cut relets in existing masonry back up or laid the flashing in the bed joint of the concrete masonry block back up (substrate). Back in those days, we did not seem to have issues with flashings falling off of the walls. Termination bars became popular in my geographical area in the mid-1990s. Back then, we purchased term bar from a roofing supply as it was not available at some of the local masonry yards.
 |
|
| Kensington Road, Chorlton Cum Hardy, Manchester, Greater Manchester, U.K. – Feb. 1913. Image courtesy of IMI |
Now, the most popular term bars are available in PVC, stainless steel and aluminum. They are of different thicknesses and varied hole spacings, and some even have a sealant lip at the top of the bars. Term bars should be located at the top of the flashing membrane. This will ensure that you can seal moisture that runs down the wall from going behind your flashings and water will bridge over the term bar, and prevent it from collecting behind the lip of the membrane.
I was taught that when I installed a term bar, I should put a bead of sealant on the wall at the location where the term bar would be fastened to the wall. In my experience, I have found it better to pre-drill my pilot holes before I apply any sealant. This allows me to pull the flashing tighter up the wall and create tighter lap joints. The best part of waiting until my pilot holes are drilled is that I can install my sealant at the back of the term bar, and place my screws in the wall without getting it all over my drills and hands.
The sealant forms a gasket behind the term bar and as you tighten it up. It is not necessary to drive it home as a snug fit will allow the sealant to seal behind the term bar properly and ooze over the top of the bar. This ooze allows you to seal the bead across the top of the term bar using the excess material, creating a bridge from the substrate to the face of the flashing. The use of drive pins to secure term bars must be handled with special attention to prevent buckling of the term bar. This could create the ability for leaks.
Drip edges and weep vents
The drip edge became common place in early-1988 in my career. It was used on an academic building in New York. Once I saw that the flashing would drain away from the face of the building, and that it was a neat and clean installation, I was convinced this was a feature of a flashing system that I would endorse for the rest of my projects. A simple application of sealant placed under the drip edge will help hold it in place while you are constructing your flashing system as well as prevent water from wicking under the drip edge into the matrix of the wall.
Weeps, at one time, were open head joints that allowed air to flow in and moisture to flow out of the veneer. During the years, many configurations of weeps have entered the market, from cotton rope, tin louvered vents, and colored high loft mesh to the widely used cell vents.
Today, weep vents usually are placed on the flashing every 24 inches. However, many also are putting them below the shelf angle at the above floor or at the cornice/soffit level as a way to increase the airflow in the cavity by the chimney effect. Flashings installed properly are a critical component to a well-constructed wall. They provide the path for water that accumulates within the wall and a pathway to the exterior, where it can evaporate.
Many contractors construct their flashings piece by piece, but new technology has allowed the introduction of TotalFlash, a unitized flashing that can be cut to size for the opening you are required to flash. This product simplifies the flashing process and reduces flashing labor without reducing final product quality.
In our trade, we all work hard every day doing so many little things that are important to the final product. We chose to make our living supporting masonry, supporting the skilled labor, the technology, equipment design (yes, Rolle, I am talking about you) and all of the many products used to create some of the most beautiful projects constructed. The importance of flashings, something you can see such a little of on a completed building, can be the difference in how a project turns out. Let’s take the time to make a difference.
Steve Fechino is engineering and construction manager for Mortar Net Solutions. He can be reached at sfechino@mortarnet.com.
| Product Watch |
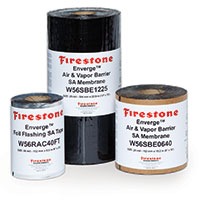
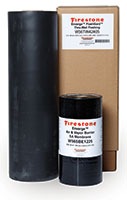 Enverge FlashGard Thru-Wall Flashing Enverge FlashGard Thru-Wall FlashingFirestone Building Products Co. has introduced a line of Enverge Cavity Wall Products. The portfolio includes air and vapor barrier, and through-wall flashing. The products work together to improve thermal performance and prevent thermal bridging in commercial buildings. Features of the Enverge Air & Vapor Barrier SA Membrane include consistent membrane thickness; 90-day construction stage exposure; self-sealing around mechanical fasteners; energy savings; continuity of application; minimized drafts and reduced moisture to guard against mold; and a broad temperature application window, down to 14 degrees Fahrenheit. The membrane also meets or exceeds ASTM D5602, D1876, D903, E283, E96 and E330.
Features of the Enverge FlashGard Thru-Wall Flashing include the availability of UV resistance and ability to remain exposed; flexibility in various temperatures, allowing for year-round installation; puncture and tear resistance; delivery of outstanding expansion and contraction characteristics; provision of durability and resistance to corrosion; and maintaining of flexibility. Also offered are labor and material cost savings, compared to metal flashings without compromising longevity; and availability in standard membrane and labor-saving, self-adhered technology. For more information on Enverge Cavity Wall Products, visit http://firestonebpco.com/wall/cavity-wall-systems. |